Command line free tutorial for deploying on your shiny server
Congrats! Now you have configured the shiny server on your virtual machine. Let’s open an terminal and scp your tutorial to the vm. What? You said you hate command lines. Ok, this blog will show you how to deploy a learnr tutorial without a single command line.
My colleague Amy Nussbaum recently introduced me to this wonderful tool called the Cyberduck, which is a libre server and cloud storage browser for Mac and Windows with support for FTP, SFTP, WebDAV, Amazon S3, OpenStack Swift, Backblaze B2, Microsoft Azure & OneDrive, Google Drive and Dropbox. You can download Cyberduck directly from their webpage https://cyberduck.io.
Step 1: open a connection on cyberduck
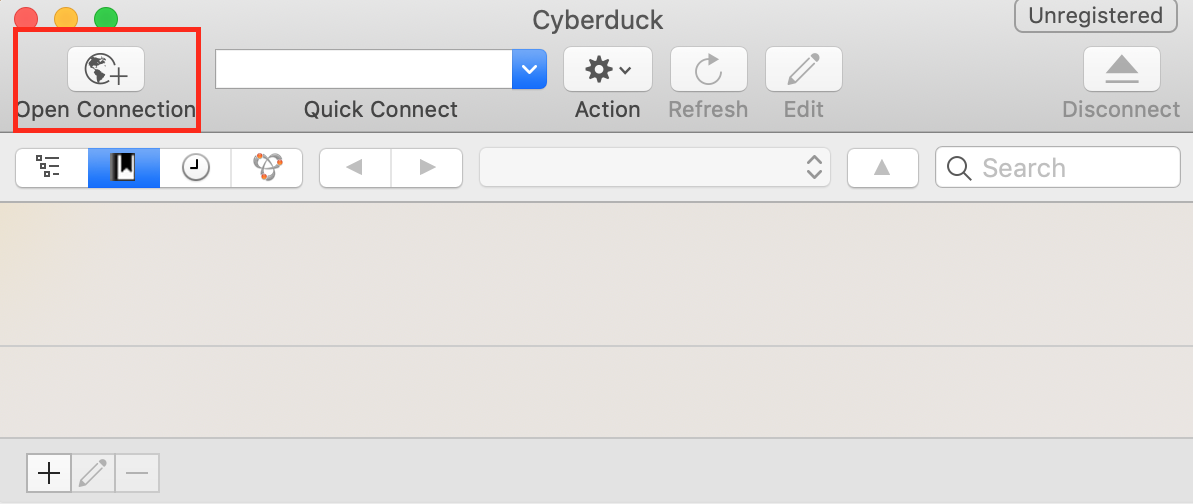
Click on the open connection button in the tool bar.
Step 2: connect to your virtual machine

- In the dropdown menu, select
SFTP (SSH File Transfer Protocol). - Type your [host_address] at
Server - Type in your username
- Type in your passwork
- Click Connect
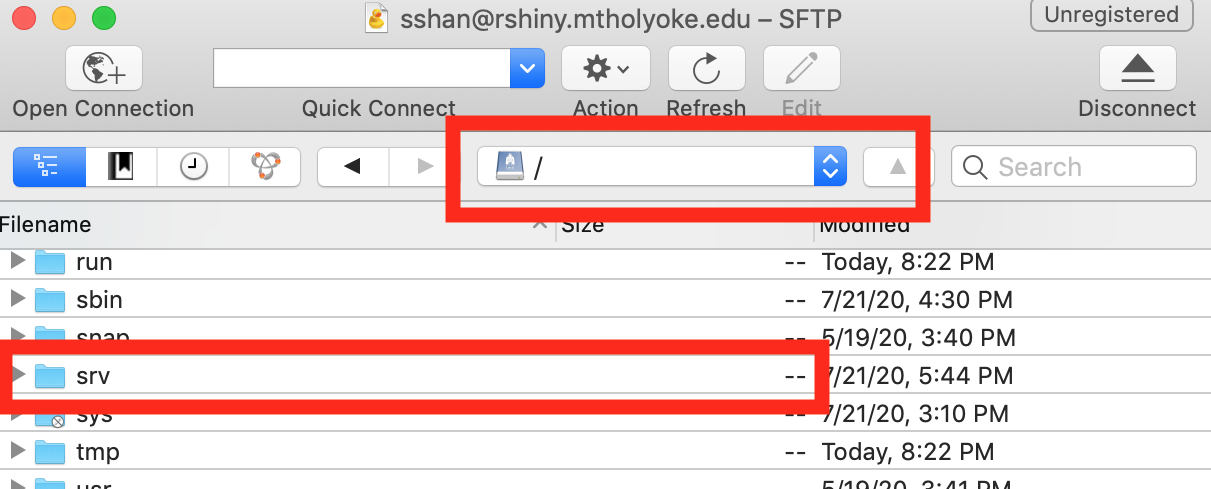
Step 3: go to the /srv/shiny-server/ folder
To host your learnr tutorial, you need to place the tutorial file (.Rmd) in the correct folder. Use the folder dropdown menu to change current working directory to /srv/shiny-server/.
You can also create a new subfolder by right-clicking your mouse. Here I created a nests of subfolders sshan/tutorials/unit1. Then simply use your mouse to drop the file(s) you want to deploy to this folder.

In general, it is recommended to create a separate folder for each learnr tutorial/shiny app.
Your tutorial is now up in the air
Violin! (Sorry viola-gang.) You have just uploaded and deployed your first learnr tutorial on the shiny server. You can view it by going to that folder’s URL listened on the IP address 138.110.84.108 with port 3838.
http://http://138.110.84.108:3838/[remote_folder]/tutorial.Rmd